This is the second article in a series about a #Kubernetes cluster I built on the RaspberryPi platform for my homelab. In my first article, I introduced the goals of the project and provided an overview of the hardware, architecture, and project roadmap:
timeline

Preliminary work
: Setup management node
: Setup a private certificate authority (CA)
: Setup multiarch container build process
: Setup local DNS
: Setup hosts

Cluster Bootstrap
: Setup Ceph on storage nodes
: Setup Microk8s
: Setup cluster GitOps pipeline - Flux, SealedSecrets, and a node debug shell
: Setup Ceph CSI Driver (ARM64)

Service CI/CD Enablement
: Setup Docker Registry
: Setup ClusterSecret
: Setup cert-manager and cert-manager-trust
: Setup Gitea and Jenkins

Observability Enablement
: Setup Prometheus
: Setup Promtail and Loki
: Setup k8s-event-logger
: Setup Grafana

Core Service Enablement
: Setup MetalLB
: Setup Nginx Ingress
: Setup Cloudflare tunnel and VPN client
: Setup OpenLDAP
In this article and those that follow, we will start our deep dive into the topics on the roadmap, beginning with some key preliminary tasks. These tasks include configuring the management node, and setting up a certificate authority (CA). Let’s get started!
Management Node Setup
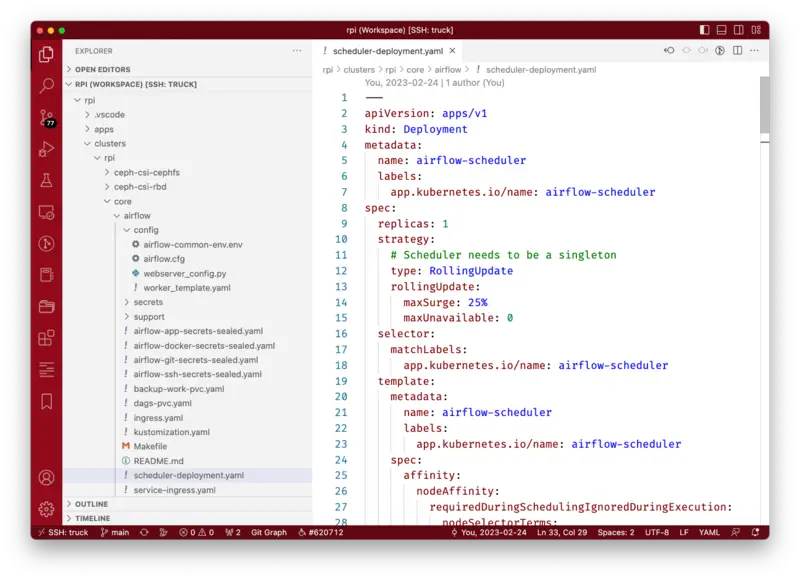
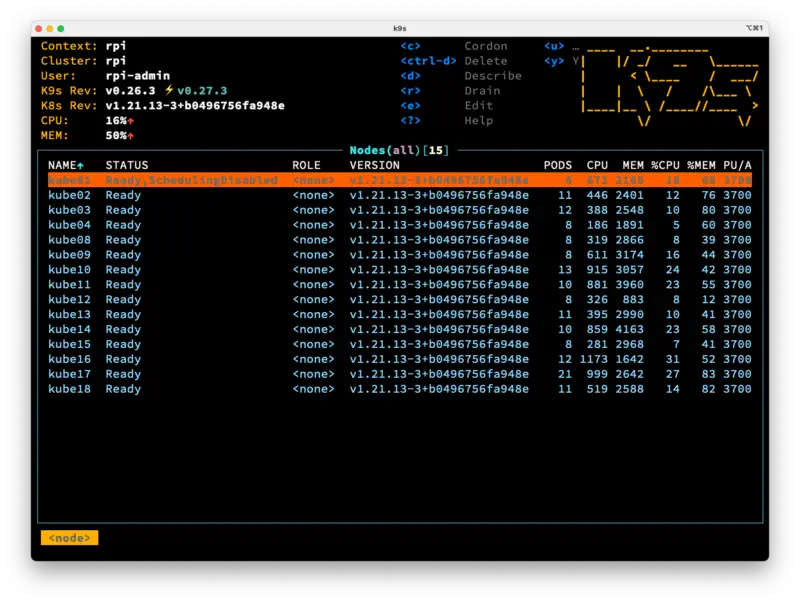
A management node serves as your workspace and provides a common environment for implementing every milestone in the cluster. The hardware requirements for the management node are minimal. In my case, I repurposed my old deep learning workstation running Ubuntu, but you could use another RaspberryPi if needed. The crucial aspect of the management node is the toolset installed. For my management node, the main tools I use are listed in the table below:
| Tool | Purpose |
|---|---|
| VSCode | VSCode is an IDE that is typically used for development however due to its flexibility and the availability of many fantastic plugins, it is well-suited to any project that edits text. |
| The standard Unix password manager | A secure and easy way to store secrets. I quickly discovered that setting up a cluster involves having to save many passwords and keys. This tool is an excellent interface to GnuPG that can store encrypted secrets hierarchically. While there are other solutions available such as Hashicorp Vault, this method works quite well and is easy to setup. |
| Kubectl | Although I am using MicroK8s for my actual Kubernetes distribution, installing the kubectl command on its own ensures that your management node doesn’t need to MicroK8s installed if it happens to be a different machine. |
| k9s | The k9s tool is a great TUI for Kubernetes. In many ways, I prefer this over other tools such as Lens since it is more responsive and I find it faster to navigate around in k9s. Moreover, k9s is a free tool and doesn’t require a subscription. |
My entire management node ecosystem is centered around VSCode since I can edit Kubernetes resource manifests, perform common git operations, and have access to an integrated terminal.

After getting the cluster up and running, I primarily interacted with it through the use of kubectl commands. However, I found this to be inefficient and cumbersome, particularly since at the time I had limited knowledge of how Kubernetes worked. Tasks such as running commands within a container, port forwarding, and reading logs or cluster events were difficult for me with only kubectl. Before I discovered k9s, I would spend hours, or even days, debugging relatively simple problems. Therefore, I strongly recommend using a tool like k9s from the beginning to save yourself time.

Private CA Setup
Configuring a private Certificate Authority (CA) is an essential task when it comes to setting up a Kubernetes cluster. In general, a CA is responsible for signing and issuing certificates used to secure communication both to and within the cluster. If you are new to the topic then Google will likely be your best resource to get an introduction.
However, managing a PKI can be challenging, expensive, and easy to do wrong. Moreover, it is essential to use caution when trusting your own root certificates, as it can expose you to man-in-the-middle attacks if an attacker can access the CA’s private key.
On the technology side, I decided to use GnuTLS over OpenSSL since certtool has - in my opinion - a significantly simpler syntax. Additionally, I am using GNU Make to help automate the process. This section reveals how I approached each of the following milestones to setup a working CA:
- Create the initial folder structure
- Generate the root CA
- Generate an intermediate CA for the homelab Kubernetes cluster
CA Folder Structure
As I discovered, having a well-thought-out folder structure is crucial to effectively manage and maintain the CA. Although this article focuses on the root and intermediate CA setup, the scope of the CA will quickly expand once other services are added. The folder structure I am currently happy with is designed to use the filesystem hierarchy to match the CA signature hierarchy. The root folder / contains artifacts for the root CA, the int/ subfolder contain intermediate CA(s), and the issue/ subfolder contains certificates signed by the CA:
flowchart TB

ROOT_CA_FOLDER("fas:fa-folder Root CA/")
ROOT_CA_CERT("fas:fa-certificate ca-cert.pem")
ROOT_CA_KEY("fas:fa-key private.p8")
ROOT_CA_TEMPLATE("fas:fa-file template.cfg")
ROOT_CA_MAKEFILE("fas:fa-file Makefile")
ROOT_CA_INT_FOLDER("fas:fa-folder int/")
ROOT_CA_ISSUE_FOLDER("fas:fa-folder issue/")
ROOT_CA_ISSUE_FOLDER_DOT("...")

INT_CA_FOLDER("fas:fa-folder Cluster CA")
INT_CA_CERT("fas:fa-certificate ca-cert.pem")
INT_CA_CSR("fas:fa-certificate ca-csr.pem")
INT_CA_KEY("fas:fa-key private.p8")
INT_CA_TEMPLATE("fas:fa-file template.cfg")
INT_CA_MAKEFILE("fas:fa-file Makefile")
INT_CA_INT("fas:fa-folder int/")
INT_CA_INT_DOT("...")
INT_CA_ISSUE("fas:fa-folder issue/")
INT_CA_ISSUE_DOT("...")

ROOT_CA_FOLDER --- ROOT_CA_CERT
ROOT_CA_FOLDER --- ROOT_CA_KEY
ROOT_CA_FOLDER --- ROOT_CA_TEMPLATE
ROOT_CA_FOLDER --- ROOT_CA_MAKEFILE
ROOT_CA_FOLDER --- ROOT_CA_INT_FOLDER
ROOT_CA_FOLDER --- ROOT_CA_ISSUE_FOLDER
ROOT_CA_INT_FOLDER --- INT_CA_FOLDER
ROOT_CA_ISSUE_FOLDER --- ROOT_CA_ISSUE_FOLDER_DOT

INT_CA_FOLDER --- INT_CA_CERT
INT_CA_FOLDER --- INT_CA_CSR
INT_CA_FOLDER --- INT_CA_KEY
INT_CA_FOLDER --- INT_CA_TEMPLATE
INT_CA_FOLDER --- INT_CA_MAKEFILE
INT_CA_FOLDER --- INT_CA_INT
INT_CA_INT --- INT_CA_INT_DOT
INT_CA_FOLDER --- INT_CA_ISSUE
INT_CA_ISSUE --- INT_CA_ISSUE_DOT
For reference, the table below provides a short description of each artifact in the hierarchy:
| Object | Description |
|---|---|
ca-cert.pem |
Certificate in PEM format |
ca-csr.pem |
Certificate signing request |
private.p8 |
Encrypted private key in PKCS8 |
template.cfg |
GnuTLS certtool configuration file |
Makefile |
The makefile us used to run a series of commands to (re)generate the CA, in the future I plan on adding targets to automate rotation when the CA expired |
int/ |
A folder that contains intermediate CAs signed by the CA in the current directory |
issue/ |
A folder that contains certificates issued and signed by the CA in the current directory |
Root CA Generation
Before you begin, you should generate and store the passwords to the root CA private key using the Unix pass tool that you set up on your management node. This will be used shortly to encrypt the root CA private key. Using the `pass“` tool will help ensure that unencrypted access to the private key is not as easy as an attacker gaining access to the right path on your filesystem.
To generate the root CA I used the following template.cfg. There isn’t anything too interesting aside from perhaps the expiration time I set to 10 years in the future. Rotation the CA and re-issuing all of the signed certificates and intermediate CAs is a major undertaking and I want to have enough time to design a process to do this effectively:
organization = "Private"
unit = "Technology Laboratory"
state = "New Mexico"
country = US
cn = "Homelab Root CA"
expiration_days = 3650
email = "YOUR@EMAIL"
ca
cert_signing_key
crl_signing_key
Next, I used a Makefile to generate the root CA certificate. In the example below I automate the certtool commands and commit the final state to a local git repository in case something is inadvertently deleted:
.DEFAULT_GOAL := help

help:
    @echo "*** Read the Makefile for targets, these operations are HIGHLY DESTRUCTIVE ***"

ca:
    rm -f ca-csr.pem ca-cert.pem ca-private.pem chain.pem
    certtool \
        --generate-privkey \
        --sec-param=medium \
        --pkcs8 \
        --outfile=private.p8
    certtool \
        --generate-self-signed \
        --template=template.cfg \
        --load-privkey=private.p8 \
        --outfile=ca-cert.pem
    git add .
    git commit -a -m 'Auto commit for: make ca'

.PHONY: ca help
With everything above in place, the root CA can be generated with the command below. The GNUTLS_PIN is being passed into make, this will be used by certtool when the certificate gets self-signed. By setting the GNUTLS_PIN to the output of the pass command it ensures that someone else on the system who can list processes won’t see the key. Additionally, this helps ensure the key doesn’t inadvertently end up in your shell history. The certtool command will prompt you one time to enter the passphrase when it encrypts the private key it just generated. Ensure this is the same passphrase that you configured using pass:
git init
GNUTLS_PIN=$(pass ca/root) make ca
Generating Cluster Intermediate CA
With the root CA in place, we can now generate the intermediate CA that will later be used by the cluster certificate manager. The example Makefile will generate the intermediate CA:
.DEFAULT_GOAL := help

ROOT_CA:=/PATH/TO/ROOT/CA

help:
    @echo "*** Read the Makefile for targets, these operations are HIGHLY DESTRUCTIVE ***"

ca:
    rm -f ca-csr.pem ca-cert.pem ca-private.pem chain.pem
    certtool \
        --generate-privkey \
        --sec-param=medium \
        --pkcs8 \
        --outfile=private.p8
    certtool \
        --generate-request \
        --template=template.cfg \
        --load-privkey=private.p8 \
        --outfile=ca-csr.pem
    certtool \
        --generate-certificate \
        --template=template.cfg \
        --load-request=ca-csr.pem \
        --load-ca-certificate=$(ROOT_CA)/ca-cert.pem \
        --load-ca-privkey=$(ROOT_CA)/private.p8 \
        --outfile=ca-cert.pem
    cat ca-cert.pem $(ROOT_CA)/ca-cert.pem > chain.pem
    git add .
    git commit -a -m 'Auto commit for: make ca'

.PHONY: ca help
The process of issuing a new CA or intermediate CA involves copying a new template somewhere under PKI_ROOT, editing template.cfg, and executing the certtool commands needed to generate and sign the new CA. I admit that this procedure may not seem scalable however keep in mind that the majority of actual certificates will be automatically issued by the homelab cluster itself and I only need to manage a single root intermediate CA. Moreover, I have automated most of the operations with GNU Make.
At this point, the intermediate CA certificate has been generated, signed, and is almost ready to use. The last step in the process is to create a trust chain for the intermediate CA. Trust chains help to establish trust between a server and a client by verifying the identity of the server through a chain of digital certificates. This ensures that the communication between the two entities is secure and that sensitive information cannot be intercepted by unauthorized parties. We will build our trust chain by simply creating a file named trust.pem that contains the PEM-encoded intermediate CA certificate and root CA certificate respectively.
Once trust.pem is generated, it can be distributed to and installed on clients so they can trust certificates signed by our new intermediate CA.
Final Thoughts
If you end up building your own homelab RaspberryPi cluster expect a slow and at times frustrating pace at the beginning. There is quite a bit of preliminary work that needs to be completed before jumping into installing and running useful services. However, if you decide that your build is primarily a learning project, remind yourself that all the tangents and rabbit holes are realizations of your ultimate goal, not roadblocks. Over time, you will accumulate knowledge and will notice following up on the tangents isn’t as much of a burden. Having the right tools configured on your management node and your private CA in place at the beginning gives you part of the required foundation needed to complete every future milestone.