
This is the first in a series of articles about a Kubernetes cluster I built on the RaspberryPi platform for my homelab.
A homelab is a self-contained network of computer systems used for testing, experimentation, and learning about technology. I have been working professionally in technology most of my life and have done fairly well without a proper homelab. However, as technology has increased in complexity and become more distributed than ever, I’m finding it more challenging to quickly setup and evaluate new technology and get the level of understanding I need.
Why Build a Homelab?
To illustrate a typical problem I run into when evaluating technology let’s consider the example of Apache Airflow. Airflow can be easily installed on a single system and started with two commands, one to launch the scheduler and the other to launch the web server. In this configuration, Airflow will happily create an SQLite database, initialize it, and seed it with enough data to get started. Unfortunately, this configuration is limited in use and doesn’t provide much intuition on what it is like to run Airflow in a real environment. Contrast this with the dizzying list of considerations that are relevant to a real Airflow deployment. By just adding an RDBMS to our Airflow installation, I am quickly faced with a significant list of considerations:
- Configuration and maintenance of the database backend (MySQL, MariaDB, Postgres, etc)
- Will I run Airflow on a multi-master MariaDB Galera cluster, master-slave, or other configuration?
- How will database backups and restores work?
- What kinds of maintenance tasks need to be run on the database?
- How will schemas be upgraded in the database during an Airflow upgrade?
- What if there is a problem during an upgrade, how can I roll back?
- Airflow can store sensitive values in the database, how can this data be encrypted at rest?
- Where will the Airflow webserver and scheduler process read the database credentials from? Will this meet my security requirements?
- How will database credentials be rotated, and what process can I put in place to minimize downtime?
- Is the database connection itself encrypted? If yes and I issue my certificates what does this process look like? How will the database store the private key associated with its certificate? How will I distribute the trusted CA chain to Airflow? How can I re-issue the database certificate with minimal downtime?
To pile on, if I need to support multiple users in a shared instance of Airflow many more considerations are necessary:
- How can I set up SSO and RBAC?
- How will multiple users deploy their DAGs?
- If my users are leveraging Git to store DAGs how will they get distributed to the Airflow webserver, scheduler, and worker components? What CI/CD process do I need to put in place to automate this process? Can I use Jenkins, GitLab, or GitHub Actions?
- How will my users promote DAGs from development to production? What controls can I put in place to secure the promotion process?
The lists go on, but hopefully, you get the idea: to get a real understanding of running Airflow, an entire ecosystem of technology is required. Airflow isn’t unique either, most technology I evaluate both personally and professionally requires a similar level of understanding to be useful. The right homelab setup will help gain a deep understanding of new technology in less time by providing a place to deploy many services that are both active for the long term and can work together. In the Airflow example, things become much simpler if MariaDB, OpenLDAP, and Jenkins are already running and properly configured.
“The right homelab setup will help gain a deep understanding of new technology in less time by providing a place to deploy many services that are both active for the long-term and can work together. In the Airflow example things become much simpler if MariaDB, OpenLDAP, and Jenkins are already running and properly configured.”
To summarize, building a homelab allows me to collect capabilities over time in the form of fully configured software and services and leverage them to quickly learn and understand new technologies.
Why The Raspberry Pi?
At the time this article was published I am in year 3 of my homelab build and needless to say, I’ve learned quite a bit about running Kubernetes. In this section, I will cover the good and bad of choosing the RaspberryPi as my platform.
The aarch64 architecture forces me to take a deeper dive into many services that would just work on a more widespread amd64 architecture. This often exposed me to more detail and quirks during setup which for a learning project is a clear advantage. On the negative side, this sometimes means having to create a multiarch build of a container I needed to install quickly wasn’t fun. Over time, I checked for aarch64 support when planning and prioritizing my installation schedule which led to fewer surprises.
The relatively low cost per node allow me to include more nodes in the cluster and provided a greater opportunity to learn about solving problems related to distributed computing.
Lastly, the relatively minimal resources on a single Raspberry Pi can quickly turn small mistakes into catastrophes. Certainly, this isn’t ideal for a production workload however is quite desirable to learn about resource management and tuning. If I had to build another homelab with identical goals, I’d definitely stick with the RaspberryPi.
Architecture
Throughout the homelab build the underlying architecture needed to change a few times as I increased my knowledge. Today, I am fairly settled into the architecture below which offers a good variety of options for the services I was running:
flowchart TB

PIHOLE("<DNS, Rpi2>\nfab:fa-raspberry-pi PiHole")
PIHOLE --- Kubernetes

subgraph Kubernetes

subgraph Control Plane
KUBE01("<Node, 4GB, uncordon>\nfab:fa-raspberry-pi kube01")
ETCD(["fas:fa-cog etcd"])
APISERVER(["fas:fa-cog kube-apiserver"])
SCHEDULER(["fas:fa-cog kube-scheduler"])
CONTROLLERMGR(["fas:fa-cog kube-controller-manager"])

KUBE01 --- ETCD
KUBE01 --- APISERVER
KUBE01 --- SCHEDULER
KUBE01 --- CONTROLLERMGR


end

subgraph 4.1.g
KUBE02("<Node, 4GB>\nfab:fa-raspberry-pi kube02")
KUBE03("<Node, 4GB>\nfab:fa-raspberry-pi kube03")
KUBE04("<Node, 4GB>\nfab:fa-raspberry-pi kube04")
KUBE16("<Node, 4GB>\nfab:fa-raspberry-pi kube16")
KUBE17("<Node, 4GB>\nfab:fa-raspberry-pi kube17")
KUBE18("<Node, 4GB>\nfab:fa-raspberry-pi kube18")
end

subgraph r4.2.g
KUBE08("<Node, 8GB>\nfab:fa-raspberry-pi kube08")
KUBE09("<Node, 8GB>\nfab:fa-raspberry-pi kube09")
end

subgraph r4.2.m
KUBE19("<Node, 8GB>\nfab:fa-raspberry-pi kube10")
KUBE11("<Node, 8GB>\nfab:fa-raspberry-pi kube11")
KUBE12("<Node, 8GB>\nfab:fa-raspberry-pi kube12")
KUBE13("<Node, 8GB>\nfab:fa-raspberry-pi kube13")
KUBE14("<Node, 8GB>\nfab:fa-raspberry-pi kube14")
KUBE15("<Node, 8GB>\nfab:fa-raspberry-pi kube15")
end

end

subgraph Storage
direction TB
KUBE05("<Node, 8GB>\nfab:fa-raspberry-pi kube05")
KUBE06("<Node, 8GB>\nfab:fa-raspberry-pi kube06")
KUBE07("<Node, 8GB>\nfab:fa-raspberry-pi kube07")

OSD0[("<ssd>\nosd.0")]
OSD1[("<ssd>\nosd.1")]
OSD2[("<ssd>\nosd.2")]
OSD3[("<ssd>\nosd.3")]
OSD4[("<ssd>\nosd.4")]
OSD5[("<ssd>\nosd.5")]

KUBE05 --- OSD4
KUBE05 --- OSD5

KUBE06 --- OSD0
KUBE06 --- OSD2

KUBE07 --- OSD1
KUBE07 --- OSD3


end

Kubernetes --- Storage
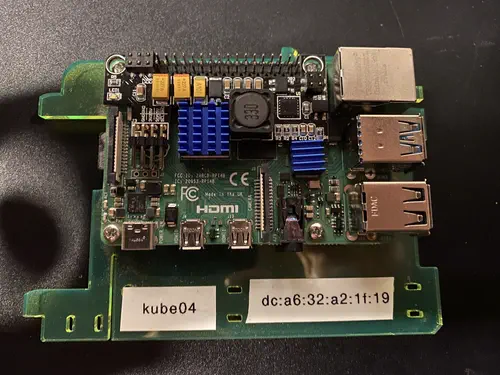
As shown, the cluster is composed of 19 RaspberryPi model 4 SBCs configured for various roles as described in the table below.
| Host(s) | Role |
|---|---|
| kube01 | Dedicated master running Kubernetes control plane services. A dedicated control plane was a necessity due to the limited resources available on a single node. Early on, the cluster had stability problems before I cordoned kube01. |
| kube02, kube03, kube04, kube16, kube17, kube18 | Reserved for long-running services with normal memory requirements. This represents the bulk of services that I am running. |
| kube08, kube09 | Reserved for long-running services with high memory requirements. Memory-hungry services are allocated to nodes in this tier. |
| kube10, kube11, kube12, kube13, kube14, kube15 | Short-lived and/or ad-hoc workloads. These nodes are reserved for CronJobs Airflow workers, Spark applications, and Jenkins builds. Nodes in this tier offer the additional advantage of being available for upgrades. When I migrated from Kubernetes v1.20 to v1.21 I started with nodes in this class since they are not dedicated to run always-on services. |
| kube05, kube06, kube07 | Cluster storage services. These nodes are dedicated to running Ceph to provide distributed storage to the entire cluster. Givin the limited resources available on each node, these nodes are 100% dedicated to storage and are not running a Kubelet. |
| pihole | Dedicated to local DNS services. Although I am running CoreDNS in the cluster for name resolution, I also need an external DNS service to manage my internal domains. Pihole was a convenient option since I already had it setup and it provides a simple web-based UI. |
Hardware
This section contains the full parts list to build the homelab. While I certainly did not have an unlimited budget price was less of a factor. I was willing to spend a bit more because, with 72 cores and 116GB RAM, this build falls a little outside the “toy” or “fun project” category for me. I realized during my early research that the homelab cluster would become a real asset to me and play a major role in keeping my skill set modernized.
| Qty | Description | Part |
|---|---|---|
| 7 | RaspberryPi | RaspberryPi Model 4 4GB |
| 11 | RaspberryPi | RaspberryPi Model 4 8GB |
| 18 | MicroSSD Cards | Samsung PRO Endurance 64GB MicroSD |
| 4 | Heatsink kit | Raspberry Pi Heatsink Kit |
| 18 | PoE Hat | LoveRPi Power-Over-Ethernet (PoE) HAT |
| 1 | PoE Switch | NETGEAR 24-Port Gigabit Ethernet Unmanaged PoE+ Switch (GS324PP) |
| 2 | Ethernet Cables | 1’ CAT 8 Ethernet Cables |
| 6 | SSD Drives | WD Blue 3D NAND 1TB Internal SSD |
| 6 | USB to SATA Cables | StarTech USB3S2SAT3CB USB 3.0 to SATA III Cable |
| 3 | Case | 8 Slot Cloudlet Cluster Case |
| 1 | Foam spacer for case | Dense Foam Needle Felting Pad |
A few comments regarding the parts list:
When the project first started only the Raspberry Pi 4GB model was available, if I ever build another cluster I would choose the 8GB version or a 16GB version if it is available. The reasoning for this is the kinds of services and workloads I tend to run fit best into a CPU/RAM ratio of 1:4; that is for every CPU there are 4GB of RAM. The 4GB and 8GB Raspberry Pi variants provide a 1:1 and 1:2 ratio respectively and have proven more challenging to fully optimize resource utilization on the cluster.
Regarding the PoE hat, the 2.5A LoverRPi hat was the best available at the time. While 2.5A is mostly sufficient there are 3A models available now which would be better, especially with the PoE+ switch.
Another problem I ran into early on was the cheap Chinese-made USB to SATA cables I had on hand didn’t fully implement the SATA specification. This was a known issue and USB storage quirks could be configured in /boot/firmware/cmdline.txt however this didn’t fully correct the issue. Therefore I highly recommend spending the extra money on higher-quality cables from a reputable manufacturer such as StarTech.
Roadmap
In the final section of this article, I wanted to share a recommended roadmap for folks that want to build a similar homelab. The roadmap outlines the sequencing of major milestones and takes into account the learnings and insights gained from the project.
timeline

Preliminary work
: Setup management node
: Setup a private certificate authority (CA)
: Setup multiarch container build process
: Setup local DNS
: Setup hosts

Cluster Bootstrap
: Setup Ceph on storage nodes
: Setup Microk8s
: Setup cluster GitOps pipeline - Flux, SealedSecrets, and a node debug shell
: Setup Ceph CSI Driver (ARM64)

Service CI/CD Enablement
: Setup Docker Registry
: Setup ClusterSecret
: Setup cert-manager and cert-manager-trust
: Setup Gitea and Jenkins

Observability Enablement
: Setup Prometheus
: Setup Promtail and Loki
: Setup k8s-event-logger
: Setup Grafana

Core Service Enablement
: Setup MetalLB
: Setup Nginx Ingress
: Setup Cloudflare tunnel and VPN client
: Setup OpenLDAP
Preliminary work encompasses the setup needed in my periphery before beginning the actual build. The cluster bootstrap milestone consists of tasks needed to install micro8ks on the cluster itself and get a basic Kubernetes cluster up an running. Enabling CI/CD was the next major milestone and is a pre-requisite to developing, building, and managing other services in the cluster. Once a solid CI/CD pipeline is established the next major milestone involves configuring the incredible observability tools available in a Kubernetes environment. This is an absolute necessity for debugging and tuning services. The last major milestone is the enablement of core cluster services including load balancing, ingress, remote access, and SSO authentication.
The remaining articles in this series will go into detail for each roadmap item, check back soon.